In this tutorial, we will learn how to publish sensor readings to ThingSpeak using ESP32 and ESP-IDF. ThingSpeak is an IoT analytics platform that let us store and read data from the cloud. This cloud platform provides an API that allows users to send data by making an HTTP request to that API.
We will use HTTP client library available in ESP-IDF to make HTTP GET requests to thingSpeak REST API using different fields. These fields will contain sensor readings. For demonstration, we will use BME280 sensor and send its temperature, pressure, and humidity readings. But you can use any sensor such as DS18B20, DHT22, BME680, and SHT31.
ThingSpeak Introduction
ThingSpeak is an IoT analytics platform service that allows users to collect and store sensor data in the cloud and perform analytics on that data. It can be used to track and monitor various types of data, such as temperature, humidity, and more, and allows users to create real-time visualizations, alerts, and more. ThingSpeak also provides an API that allows users to integrate their sensor data with other platforms and applications.
To use the ThingSpeak API, you will first need to create an account on the ThingSpeak website and set up a channel to store your sensor data we will see these steps in the next section.
ThingSpeak provides an API key and we use this API key to construct a URL that can be called from our ESP32 ESP-IDF code to send data to the cloud.
"https://api.thingspeak.com/update?api_key=YOUR_API_KEY&field1=VALUE1&field2=VALUE2&field3=VALUE3"We will send a GET or POST request to the above API URL using ESP32 ESP-IDF.
Get ThingSpeak API key
Go to the ThingSpeak website (https://thingspeak.com/) and click on the “Get Started for Free” button to create an account.

Fill in the required information and click on the “Sign Up” button to complete the registration process.

Click ‘OK’.

Create ThingSpeaK Channel
After logging in, click on the “New Channel” button to create a new channel.

Fill in the channel name and description, and select the number of fields you want to use. For a BME280 sensor, you will need three fields such as temperature, pressure, and humidity.

Your channel will now be created.

Go to private view and click the pencil icon on top of each Field Chart. This will let us customize the graphs according to our preference. You can add details accordingly. After you press the Save button, the chart will get updated to the settings you just set.

After creating the channel, you can find the API keys for your channel on the “API Keys” tab. You will need the write API key to send data to the channel, and the read API key to retrieve data from the channel.

So far we have created a ThingSpeak account and gotten the API key. Now let’s create an ESP-IDF project to send BME280 sensor readings to this IoT analytics platform.
Interfacing BME280 with ESP32
BME280 sensor is widely used in electronic projects to measure ambient temperature, barometric pressure, and relative humidity where low power consumption is required. Both I2C and SPI communication protocols can be used to send data over to the microcontroller. Although the BME280 sensor comes in various versions, we will use I2C communication to communicate the sensor data with the ESP32 board. This protocol is based on a synchronous, multi-master multi-slave system where the ESP32 board acts as the master and the BME280 sensor acts as the slave.
We will need the following components to connect our ESP32 board with the BME280 sensor.
- ESP32 board
- BME280 Sensor
- Connecting Wires
- Breadboard
The connection of I2C LCD with the ESP32 board is straightforward as it just involves the connection of the 4 pins (GND, VCC, SDA, and SCL) with ESP32. We have to connect the VCC terminal with 3.3V pin, ground with the ground (common ground), SCL of the sensor with SCL of ESP32 board, and SDA of the sensor with the SDA pin of the ESP32 board.
In ESP32, the default I2C pin for SDA is GPIO21 and for SCL is GPIO22.
The connections between the devices are specified in the table below:
| BME280 Sensor | ESP32 |
|---|---|
| GND | GND |
| VCC | 3.3V |
| SDA | GPIO21(I2C SDA) |
| SCL | GPIO22 (I2C SCL) |

You can read these guides about BME280:
- BME280 with ESP32 ESP-IDF and Display Readings on OLED
- ESP32 MQTT Publish BME280 Sensor Readings to Node-Red using ESP-IDF
Create ESP32 ESP-IDF Project to Send Sensor Readings to ThingSpeak
In this section, let’s create an ESP-IDF project to send sensor readings to ThingSpeak from ESP32 and BME280.
Open your VS Code and head over to View > Command Palette. Type ESP-IDF: New Project in the search bar and press enter.
Specify the project name and directory. We have named our project ‘esp32_thingspeak.’ For the ESP-IDF board, we have chosen the custom board option. For ESP-IDF target, choose ESP32 module. Click ‘Choose Template’ button to proceed forward.

In the Extension, select the ESP-IDF option:

We will click the ‘sample_project’ under the get-started tab. Now click ‘Create a project using template sample_project.’

You will get a notification that the project has been created. To open the project in a new window, click ‘Yes.’
This opens the project that we created inside the EXPLORER tab. There are several folders inside our project folder. This is the same for every project which you will create through ESP-IDF Explorer.
Add BME280 ESP-IDF Library to Project
First, let’s add the necessary header files for the libraries required for this project. Create a new folder called ‘components/bme280’ and add the following files present at this link. This includes all the files listed below:
- bme280.h
- bme280_support.c
- bme280.c
- CMakeLists.txt
ESP32 ESP-IDF Code to Send Sensor Readings to ThingSpeak
This code is a program written in C for the ESP32 using the ESP-IDF framework that sends BME280 sensor readings to ThingSpeak after every 5 seconds. Copy the following code to main.c file in your esp-idf project.
#include <stdio.h>
#include <string.h>
#include <stdlib.h>
#include "esp_log.h"
#include "nvs_flash.h"
#include "esp_event.h"
#include "esp_netif.h"

#include "freertos/FreeRTOS.h"
#include "freertos/task.h"
#include "esp_system.h"

#include "esp_http_client.h"
#include "connect_wifi.h"
#include "bme280.h"
#include "driver/i2c.h"

static const char *TAG = "HTTP_CLIENT";
char api_key[] = "replace_with_your_api_key";

#define SDA_PIN GPIO_NUM_21
#define SCL_PIN GPIO_NUM_22

#define TAG_BME280 "BME280"

#define I2C_MASTER_ACK 0
#define I2C_MASTER_NACK 1

double temp;
double press;
double hum;

void i2c_master_init()
{
	i2c_config_t i2c_config = {
		.mode = I2C_MODE_MASTER,
		.sda_io_num = SDA_PIN,
		.scl_io_num = SCL_PIN,
		.sda_pullup_en = GPIO_PULLUP_ENABLE,
		.scl_pullup_en = GPIO_PULLUP_ENABLE,
		.master.clk_speed = 1000000};
	i2c_param_config(I2C_NUM_0, &i2c_config);
	i2c_driver_install(I2C_NUM_0, I2C_MODE_MASTER, 0, 0, 0);
}

s8 BME280_I2C_bus_write(u8 dev_addr, u8 reg_addr, u8 *reg_data, u8 cnt)
{
	s32 iError = BME280_INIT_VALUE;

	esp_err_t espRc;
	i2c_cmd_handle_t cmd = i2c_cmd_link_create();

	i2c_master_start(cmd);
	i2c_master_write_byte(cmd, (dev_addr << 1) | I2C_MASTER_WRITE, true);

	i2c_master_write_byte(cmd, reg_addr, true);
	i2c_master_write(cmd, reg_data, cnt, true);
	i2c_master_stop(cmd);

	espRc = i2c_master_cmd_begin(I2C_NUM_0, cmd, 10 / portTICK_PERIOD_MS);
	if (espRc == ESP_OK)
	{
		iError = SUCCESS;
	}
	else
	{
		iError = FAIL;
	}
	i2c_cmd_link_delete(cmd);

	return (s8)iError;
}

s8 BME280_I2C_bus_read(u8 dev_addr, u8 reg_addr, u8 *reg_data, u8 cnt)
{
	s32 iError = BME280_INIT_VALUE;
	esp_err_t espRc;

	i2c_cmd_handle_t cmd = i2c_cmd_link_create();

	i2c_master_start(cmd);
	i2c_master_write_byte(cmd, (dev_addr << 1) | I2C_MASTER_WRITE, true);
	i2c_master_write_byte(cmd, reg_addr, true);

	i2c_master_start(cmd);
	i2c_master_write_byte(cmd, (dev_addr << 1) | I2C_MASTER_READ, true);

	if (cnt > 1)
	{
		i2c_master_read(cmd, reg_data, cnt - 1, I2C_MASTER_ACK);
	}
	i2c_master_read_byte(cmd, reg_data + cnt - 1, I2C_MASTER_NACK);
	i2c_master_stop(cmd);

	espRc = i2c_master_cmd_begin(I2C_NUM_0, cmd, 10 / portTICK_PERIOD_MS);
	if (espRc == ESP_OK)
	{
		iError = SUCCESS;
	}
	else
	{
		iError = FAIL;
	}

	i2c_cmd_link_delete(cmd);

	return (s8)iError;
}

void BME280_delay_msek(u32 msek)
{
	vTaskDelay(msek / portTICK_PERIOD_MS);
}

void bme280_get_readings(void *ignore)
{
	struct bme280_t bme280 = {
		.bus_write = BME280_I2C_bus_write,
		.bus_read = BME280_I2C_bus_read,
		.dev_addr = BME280_I2C_ADDRESS1,
		.delay_msec = BME280_delay_msek};

	s32 com_rslt;
	s32 v_uncomp_pressure_s32;
	s32 v_uncomp_temperature_s32;
	s32 v_uncomp_humidity_s32;

	com_rslt = bme280_init(&bme280);

	com_rslt += bme280_set_oversamp_pressure(BME280_OVERSAMP_16X);
	com_rslt += bme280_set_oversamp_temperature(BME280_OVERSAMP_2X);
	com_rslt += bme280_set_oversamp_humidity(BME280_OVERSAMP_1X);

	com_rslt += bme280_set_standby_durn(BME280_STANDBY_TIME_1_MS);
	com_rslt += bme280_set_filter(BME280_FILTER_COEFF_16);

	com_rslt += bme280_set_power_mode(BME280_NORMAL_MODE);
	if (com_rslt == SUCCESS)
	{
		while (true)
		{
			vTaskDelay(4000 / portTICK_PERIOD_MS);

			com_rslt = bme280_read_uncomp_pressure_temperature_humidity(
				&v_uncomp_pressure_s32, &v_uncomp_temperature_s32, &v_uncomp_humidity_s32);

			if (com_rslt == SUCCESS)
			{
				ESP_LOGI(TAG_BME280, "%.2f degC / %.3f hPa / %.3f %%",
						 bme280_compensate_temperature_double(v_uncomp_temperature_s32),
						 bme280_compensate_pressure_double(v_uncomp_pressure_s32) / 100, // Pa -> hPa
						 bme280_compensate_humidity_double(v_uncomp_humidity_s32));
				temp = bme280_compensate_temperature_double(v_uncomp_temperature_s32);
				press = bme280_compensate_pressure_double(v_uncomp_pressure_s32) / 100;
				hum = bme280_compensate_humidity_double(v_uncomp_humidity_s32);
			}
			else
			{
				ESP_LOGE(TAG_BME280, "measure error. code: %d", com_rslt);
			}
		}
	}
	else
	{
		ESP_LOGE(TAG_BME280, "init or setting error. code: %d", com_rslt);
	}

	vTaskDelete(NULL);
}

void send_data_to_thingspeak(void *pvParameters)
{

	char thingspeak_url[] = "https://api.thingspeak.com";
	char data[] = "/update?api_key=%s&field1=%.2f&field2=%.2f&field3=%.2f";
	char post_data[200];
	esp_err_t err;

	esp_http_client_config_t config = {
		.url = thingspeak_url,
		.method = HTTP_METHOD_GET,
	};
	esp_http_client_handle_t client = esp_http_client_init(&config);
	esp_http_client_set_header(client, "Content-Type", "application/x-www-form-urlencoded");
	while (1)
	{
		vTaskDelay(5000 / portTICK_RATE_MS);
		strcpy(post_data, "");
		snprintf(post_data, sizeof(post_data), data, api_key, temp, press, hum);
		ESP_LOGI(TAG, "post = %s", post_data);
		esp_http_client_set_post_field(client, post_data, strlen(post_data));

		err = esp_http_client_perform(client);

		if (err == ESP_OK)
		{
			int status_code = esp_http_client_get_status_code(client);
			if (status_code == 200)
			{
				ESP_LOGI(TAG, "Message sent Successfully");
			}
			else
			{
				ESP_LOGI(TAG, "Message sent Failed");
				goto exit;
			}
		}
		else
		{
			ESP_LOGI(TAG, "Message sent Failed");
			goto exit;
		}
	}
exit:
	esp_http_client_cleanup(client);
	vTaskDelete(NULL);
}

void app_main(void)
{
	esp_err_t ret = nvs_flash_init();
	if (ret == ESP_ERR_NVS_NO_FREE_PAGES || ret == ESP_ERR_NVS_NEW_VERSION_FOUND)
	{
		ESP_ERROR_CHECK(nvs_flash_erase());
		ret = nvs_flash_init();
	}
	ESP_ERROR_CHECK(ret);
	i2c_master_init();
	connect_wifi();
	if (wifi_connect_status)
	{
		xTaskCreate(&bme280_get_readings, "bme280_get_readings", 2048, NULL, 5, NULL);
		xTaskCreate(&send_data_to_thingspeak, "send_data_to_thingspeak", 8192, NULL, 6, NULL);
	}
}
How Code Works?
The BME280 part of the above code is similar to what is explained in the following tutorial. You can refer to the following code. We will only explain part of the code where we make an HTTP request to ThingSpeak from ESP32 to send BME280 sensor readings.
These lines of code include several headers such as “stdio.h”, “string.h” and “stdlib.h” which provide basic input/output operations, string manipulation, and memory allocation functions respectively.
It also includes headers specific to the ESP32 microcontroller such as “esp_log.h”, “nvs_flash.h”, “esp_event.h” and “esp_netif.h”. These headers provide functions for logging, non-volatile storage, event handling, and network interface management, and BME280 driver.
#include <stdio.h>
#include <string.h>
#include <stdlib.h>
#include "esp_log.h"
#include "nvs_flash.h"
#include "esp_event.h"
#include "esp_netif.h"

#include "freertos/FreeRTOS.h"
#include "freertos/task.h"
#include "esp_system.h"

#include "esp_http_client.h"
#include "connect_wifi.h"
#include "bme280.h"
#include "driver/i2c.h"
These lines define some constants such as the I2C bus pins to which BME280 will be connected and an API key from ThingSpeak. It also defines some variables to store temperature, pressure, and humidity data read from BME280 sensor.
static const char *TAG = "HTTP_CLIENT";
char api_key[] = "replace_with_your_api_key";

#define SDA_PIN GPIO_NUM_21
#define SCL_PIN GPIO_NUM_22

#define TAG_BME280 "BME280"

#define I2C_MASTER_ACK 0
#define I2C_MASTER_NACK 1

double temp;
double press;
double hum;
Send Senor Data to ThingSpeak Function
This function is responsible for sending BME280 sensor readings to ThingSpeak from ESP32 after every 5 seconds using the ESP-IDF HTTP client library. The function send_data_to_thingspeak() takes in a void pointer as a parameter.
void send_data_to_thingspeak(void *pvParameters)
Now declare different strings and variables. Declare a char array called thingspeak_url and assigns it the string “https://api.thingspeak.com” which is address of ThingSpeak. Next, declare a char array called data and assigns it a string with a format for the data to be sent in the request URL.
char thingspeak_url[] = "https://api.thingspeak.com";
char data[] = "/update?api_key=%s&field1=%.2f&field2=%.2f&field3=%.2f";
char post_data[200];
esp_err_t err;
Now declares a struct called “config” which is used to configure the HTTP client with the URL and the method “HTTP_METHOD_GET”. Next, it creates a handle for the HTTP client using the “esp_http_client_init” function and “config” struct.
	esp_http_client_config_t config = {
		.url = thingspeak_url,
		.method = HTTP_METHOD_GET,
	};
	esp_http_client_handle_t client = esp_http_client_init(&config);
Next initializes an HTTP client handle with the config and sets the header of the client to “Content-Type” with a value of “application/x-www-form-urlencoded”
esp_http_client_set_header(client, "Content-Type", "application/x-www-form-urlencoded");
Code inside while loop executes after every 5 seconds. It publishes BME280 sensor readings to ThingSpeak.
First use the snprintf() function to format the post_data array with the data string, api_key, temp, press, and hum variables which is ThingSpeak API, temperature, pressure and humidity values from BME280 sensor, respectively.
strcpy(post_data, "");
snprintf(post_data, sizeof(post_data), data, api_key, temp, press, hum);
ESP_LOGI(TAG, "post = %s", post_data);
Next set the post field of the client to the post_data array and its length. Finally, performs the HTTP request using the esp_http_client_perform() function, and assigns the result to the err variable.
esp_http_client_set_post_field(client, post_data, strlen(post_data));

err = esp_http_client_perform(client);
At the end code check whether the err variable equals ESP_OK or not which checks if HTTP request was successful or not. If err equals ESP_OK, the code checks the status code of the response. If the status code is 200, print a message indicating that the message was sent successfully. If the status code is not 200, print a message indicating that the message was sent failed and then goes to the exit label.
If err does not equal ESP_OK, that means HTTP request was not successfull and sensor data has not been sent successfully and print a message indicating that the message was sent failed and then goes to the exit label.
The esp_http_client_cleanup function is called to free the resources associated with the client variable. The vTaskDelete(NULL) function is called to delete the current task.
if (err == ESP_OK)
		{
			int status_code = esp_http_client_get_status_code(client);
			if (status_code == 200)
			{
				ESP_LOGI(TAG, "Message sent Successfully");
			}
			else
			{
				ESP_LOGI(TAG, "Message sent Failed");
				goto exit;
			}
		}
		else
		{
			ESP_LOGI(TAG, "Message sent Failed");
			goto exit;
		}
	}
exit:
	esp_http_client_cleanup(client);
	vTaskDelete(NULL);
In short, this function sends data to a ThingSpeak cloud using the ESP-IDF HTTP client library. The data includes an API key and three fields, field1, field2, and field3. The code sends the data in an infinite loop with a delay of 5000 milliseconds between each iteration.
Main App Function
The “app_main” is the entry point of the application. It initializes the Non-Volatile Storage (NVS) flash on the ESP32 microcontroller, which is used to store data that needs to survive a power cycle. After that, it calls “nvs_flash_init” to initialize the NVS flash and checks the return value. If the return value is “ESP_ERR_NVS_NO_FREE_PAGES” or “ESP_ERR_NVS_NEW_VERSION_FOUND”, it means that the NVS flash needs to be erased and initialized again. Then calls “ESP_ERROR_CHECK” to check if there is an error with the NVS flash initialization.
esp_err_t ret = nvs_flash_init();
	if (ret == ESP_ERR_NVS_NO_FREE_PAGES || ret == ESP_ERR_NVS_NEW_VERSION_FOUND)
	{
		ESP_ERROR_CHECK(nvs_flash_erase());
		ret = nvs_flash_init();
	}
	ESP_ERROR_CHECK(ret);
Initializes the I2C master, which is used to communicate with the BME280 sensor.
i2c_master_init();
Connects to a wifi network by calling the “connect_wifi()” function.
connect_wifi();
If the wifi connection is successful, it creates two tasks:
- The first task is the “bme280_get_readings” task, which reads data from the BME280 sensor and stores it in global variables.
- The second task is the “send_data_to_thingspeak” task, which sends the sensor data to the ThingSpeak IoT platform using HTTP requests.
if (wifi_connect_status)
	{
		xTaskCreate(&bme280_get_readings, "bme280_get_readings", 2048, NULL, 5, NULL);
		xTaskCreate(&send_data_to_thingspeak, "send_data_to_thingspeak", 8192, NULL, 6, NULL);
	}
Note: there is one header file with the name of “connect_wifi.h” in this project, we have created this in previous tutorials. You also need to add that file. You can download complete project from next section download link.
ESP-IDF Send Sensor Readings to ThingSpeak Number Demo
In this section, we will see a demo to Send Messages to WhatsApp. First of all, download the complete project from the following link and build the project.
Configure Wi-Fi Credentials
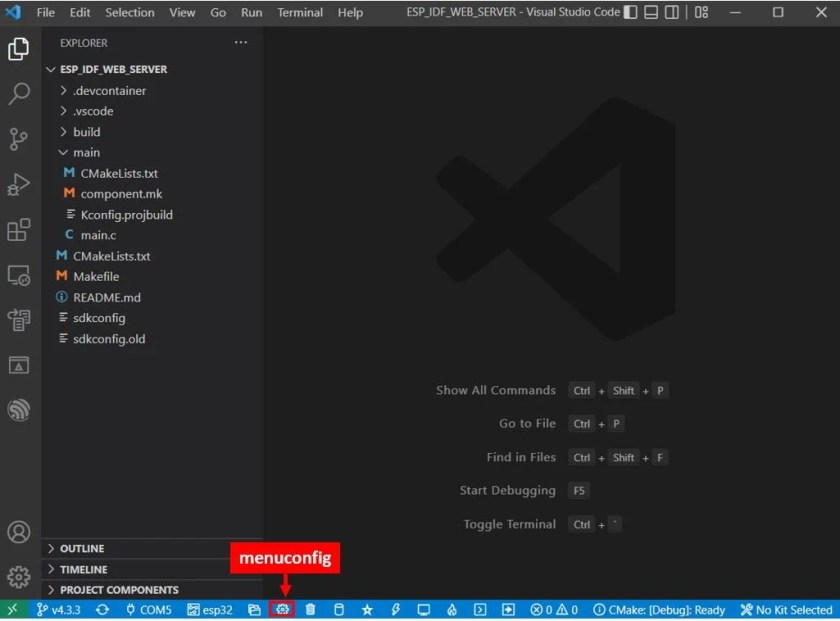
Now head over to the menuconfig. Click the icon shown below. It opens the ESP-IDF SDK Configuration Editor.
Scroll down and open the Example Configuration. Here we can set the configuration parameters for this example according to our needs. This includes the Wi-Fi SSID, Wi-Fi password, and Maximum retry number. Specify the Wi-Fi SSID and password of your router that the ESP32 board will connect to. By default, the maximum retries are set to 5. You can change it according to your preference. After specifying the configuration parameters, click the Save button on the top.

Disable ESP TLS
We are using HTTP instead of HTTPS therefore we need to disable the ESP-TLS component from settings->Components Config>ESP-TL.

To flash your chip, type the following command in the serial terminal. Remember to replace the COM port with the one through which your board is connected.
idf.py -p COMX flash monitor
After the code flashes successfully, you can view all the informational logs. First, the station Wi-Fi is initialized. Then we can view the esp_netif_handlers which includes the IP, mask, and gw addresses. Then we get the log “got IP” followed by the IP address which shows that ESP32 has successfully connected with your Wi-Fi network.
Now if everything works fine, you will get messages on the console that “Message sent Successfully” as shown below.

Now open your ThinkgSpeak account and you will be able to view sensor readings on graphs as shown below:

You may also like to read:
- ESP32 ESP-IDF Send Messages to WhatsApp Number
- ESP32 ESP-IDF WebSocket Web Server with LED Control Example
- ESP32 ESP-IDF SPIFFS Web Server
- ESP32-CAM ESP-IDF Live Streaming Web Server
- ESP32-CAM ESP-IDF Take Photos and Save into SD Card
- ESP32 ESP-IDF MQTT Publish BME680 Sensor Readings
- ESP32 BME680 Web Server ESP-IDF
We are a team of experienced Embedded Software Developers with skills in developing Embedded Linux, RTOS, and IoT products from scratch to deployment with a demonstrated history of working in the embedded software industry. Contact us for your projects: admin@esp32tutorials.com
The example is not working on my ESP32.
This is the working code of mine:
———————————————————————————————-
char thingspeak_url[] = “https://api.thingspeak.com”;
char data[] = “/update?api_key=%s&field1=%.2f&field2=%.2f&field3=%.2f”;
char post_data[200];
esp_err_t err;
data_t sen_data;
esp_http_client_config_t config = {
.url = thingspeak_url,
.method = HTTP_METHOD_GET,
.transport_type = HTTP_TRANSPORT_OVER_SSL, // Specify transport type
.crt_bundle_attach = esp_crt_bundle_attach, // Attach the certificate bundle
};
esp_http_client_handle_t client = esp_http_client_init(&config);
esp_http_client_set_header(client, “Content-Type”, “application/x-www-form-urlencoded”);
while (1)
{
// Blocking wait for new data
sen_data = pop_queue();
strcpy(post_data, “”);
snprintf(post_data, sizeof(post_data), data, api_key, sen_data.temp, sen_data.hum, sen_data.press);
ESP_LOGI(TAG, “post = %s”, post_data);
esp_http_client_set_url(client, post_data);
err = esp_http_client_perform(client);
———————————————————————————————-
This is because you are using a secure connection with ThingSpeak, and we have disabled TLS inside this code as mentioned in the article. Please read the demo part for more information
The request cannot be sent if I don’t ad the following two lines:
.transport_type = HTTP_TRANSPORT_OVER_SSL, // Specify transport type
.crt_bundle_attach = esp_crt_bundle_attach, // Attach the certificate bundle
And I have checked with my local server written in Python flask.
The data sent in this line will be in “request body” instead of “arguments in url”:
esp_http_client_set_post_field(client, post_data, strlen(post_data));
This line is the code that send the data in “arguments in url” which ThingSpeak expected:
esp_http_client_set_url(client, post_data);
This worked!!!
Heres the changes I made:
1. in config:
esp_http_client_config_t config = {
.url = thingspeak_url,
.method = HTTP_METHOD_GET,
.transport_type = HTTP_TRANSPORT_OVER_SSL,
.crt_bundle_attach = esp_crt_bundle_attach,
};
2. replace
esp_http_client_set_post_field(client, post_data, strlen(post_data));
with
esp_http_client_set_url(client, post_data);
Thanks the friend,
I tested it’s working. But there is something that doesn’t make much sense. Why did we need to specify the URL [esp_http_client_set_url(client, post_data)] as a path containing data? If the URL we need to set is the URL, should we write only the URL, or if it is the entire path, shouldn’t we write the entire path containing the data containing the URL? Luckily it worked in the end. Has anyone tried this data transfer with a certificate?
Hello,
I am not sure what you did there is entirely correct. Don’t mix up two methods of get and post. I did what you did(the tutorial) but my result is that in the console I see that I have sent the data but the actual graph of thingspeak is not updated at all. What I am doing wrong?
This is my code:
#include
#include
#include “freertos/event_groups.h”
#include
#include
#include
#include
#include “esp_system.h”
#include “esp_console.h”
#include “esp_vfs_dev.h”
#include “esp_vfs_fat.h”
#include “driver/uart.h”
#include “esp_event.h”
#include “esp_netif.h”
#include “esp_log.h”
#include “nvs_flash.h”
#include
#include “esp_crt_bundle.h”
#include “esp_tls.h”
#include “esp_http_client.h”
#include
#include “connect_wifi.h”
#include
static const char *TAG = “HTTP_CLIENT”;
char api_key[] = “S9E3V61QZ87PODC5”;
hx711_t hx711_dev = {
.dout = GPIO_NUM_27, // Set the GPIO pin connected to DOUT
.pd_sck = GPIO_NUM_26, // Set the GPIO pin connected to PD_SCK
.gain = HX711_GAIN_A_128 // Set the desired gain value max default gain 128
};
/** GLOBAL VARIABLES **/
int32_t tare_value;
float calibration_factor;
int32_t weight;
// function fo hx711 calibration
void hx711_calibrate( hx711_t *dev, float *calibration_factor )
{
printf( “Place a known reference weight on the load cell…. ” );
while ( getchar() != ‘\n’ ); // Wait for user to press Enter
float reference_weight;
// promts the user to enter a value sitting on the scale
printf( “Enter the weight in grams: ” );
scanf( “%5f\n”, &reference_weight );
printf( “You entered: %.2f\n”, reference_weight );
hx711_set_gain( dev, dev->gain ); // Set the gain before calibration
int32_t read_raw_sum = 0;
int32_t read_raw;
int32_t num_samples = 10;
for ( int i = 0; i < num_samples; i++ )
{
ESP_ERROR_CHECK( hx711_read_data( dev, &read_raw ) );
read_raw_sum += read_raw;
printf( "read_raw_data= %ld\n", read_raw );
vTaskDelay( pdMS_TO_TICKS( 500 ) ); // Delay for 500 milliseconds
}
*calibration_factor = ( float )reference_weight / ( float )( read_raw_sum / num_samples );
printf( "Calibration completed. Calibration factor: %.2f\n", *calibration_factor );
}
void hx711_tare( hx711_t *dev, int32_t *tare_value )
{
printf( "Remove calibration weight\n" );
vTaskDelay( pdMS_TO_TICKS( 5000 ) );
int32_t read_raw;
ESP_ERROR_CHECK(hx711_read_average(dev, 10, &read_raw)); // Read an average of 10 samples
*tare_value = read_raw;
printf( "Tare completed. Tare value: %ld\n", *tare_value );
}
void hx711_print_weight( hx711_t *dev, int32_t tare_value, float calibration_factor, int32_t *weight )
{
int32_t data;
ESP_ERROR_CHECK(hx711_read_average( dev, 10, &data )); // Read an average of 10 samples
//printf( "The value of data:%ld\n", data );
data -= tare_value;
*weight = ( int32_t )( ( float )data * calibration_factor );
*weight = abs(*weight); // Take the absolute value of the weight
printf( "Weight: %ld grams\n", *weight );
}
void send_data_to_thingspeak( void *pvParameters )
{
char thingspeak_url[] = "https://api.thingspeak.com";
char data[] = "/update?api_key=%sfield1=%ld";
char post_data[200];
esp_err_t err;
esp_http_client_config_t config =
{
.url = thingspeak_url,
.method = HTTP_METHOD_GET,
.auth_type = HTTP_AUTH_TYPE_BASIC,
.transport_type = HTTP_TRANSPORT_OVER_SSL,
.crt_bundle_attach = esp_crt_bundle_attach,
};
esp_http_client_handle_t client = esp_http_client_init( &config );
esp_http_client_set_header( client, "Content-Type", "application/x-www-form-urlencoded" );
while (1)
{
vTaskDelay( pdMS_TO_TICKS( 5000 ) );
strcpy( post_data, "" );
snprintf( post_data, sizeof( post_data ), data, api_key, weight );
ESP_LOGI( TAG, "get = %s", post_data );
esp_http_client_set_url( client, thingspeak_url );
esp_http_client_read( client, post_data, weight );
esp_http_client_get_post_field( client, &weight );
esp_http_client_set_post_field( client, post_data, strlen( post_data ) );
err = esp_http_client_perform( client );
if ( err == ESP_OK )
{
int status_code = esp_http_client_get_status_code( client );
if ( status_code == 200 )
{
ESP_LOGI( TAG, "Message sent Successfully" );
}
else
{
ESP_LOGI( TAG, "Message sent Failed" );
goto exit;
}
}
else
{
ESP_LOGI( TAG, "Message sent Failed hard" );
goto exit;
}
}
exit:
esp_http_client_cleanup( client );
vTaskDelete( NULL );
}
void hx711_print_weight_wrapper( void *pvParameters )
{
while(1)
{
hx711_print_weight( &hx711_dev, tare_value, calibration_factor, &weight );
vTaskDelay(pdMS_TO_TICKS(1500));
}
}
void initialize_console()
{
setvbuf( stdin, NULL, _IONBF, 0 );
setvbuf( stdout, NULL, _IONBF, 0 );
ESP_ERROR_CHECK(uart_driver_install( CONFIG_ESP_CONSOLE_UART_NUM, 256, 0, 0, NULL, 0 ) );
esp_vfs_dev_uart_use_driver( CONFIG_ESP_CONSOLE_UART_NUM );
esp_vfs_dev_uart_port_set_rx_line_endings( CONFIG_ESP_CONSOLE_UART_NUM, ESP_LINE_ENDINGS_CR );
esp_vfs_dev_uart_port_set_tx_line_endings( CONFIG_ESP_CONSOLE_UART_NUM, ESP_LINE_ENDINGS_CRLF );
}
void app_main()
{
// Initialize the Wi-Fi connection nvs – non volatile storage
esp_err_t ret = nvs_flash_init();
if ( ret == ESP_ERR_NVS_NO_FREE_PAGES || ret == ESP_ERR_NVS_NEW_VERSION_FOUND )
{
ESP_ERROR_CHECK( nvs_flash_erase() );
ret = nvs_flash_init();
}
ESP_ERROR_CHECK( ret );
wifi_init_sta();
// Initialize HX711 device
ESP_ERROR_CHECK( hx711_init( &hx711_dev ) );
//configure UART console for input and output
initialize_console();
// Perform calibration
hx711_calibrate( &hx711_dev, &calibration_factor );
// Perform tare operation
hx711_tare( &hx711_dev, &tare_value );
// Read and print weight continuously
/* while (1)
{
hx711_print_weight( &hx711_dev, tare_value, calibration_factor, &weight );
vTaskDelay( pdMS_TO_TICKS( 1500 ) ); // Delay for 1.5 seconds between readings
} */
if( wifi_connect_status )
{
xTaskCreate( &hx711_print_weight_wrapper, "hx711_print_weight", 8192, NULL, 5, NULL);
xTaskCreate( &send_data_to_thingspeak, "send_data_to_thingspeak", 8192, NULL, 6, NULL );
}
while (1)
{
vTaskDelay(pdMS_TO_TICKS(1500)); // Delay for 1 second in the main loop
}
}
It works fine for us
Hello Mr. Bilal. Thank you your article. i am monitoring everythings is fine but i cant show data on my channel in thingspeak. I tryed so much combination but i didnt achive it. ı am sure method in program :HTTP_GET and i closed TLS. I wonder that i should take ok message from ThingSpeak Server if i take sent Successfully message from HTTP_CLIENT . Isn’t true ? Can you help me please?
Monitor screen :
I (161701) HTTP_CLIENT: Message sent Successfully
I (162481) BME280: 24.21 degC / 1010.481 hPa / 51.368 %
I (166481) BME280: 24.21 degC / 1010.475 hPa / 51.391 %
I (166701) HTTP_CLIENT: post = /update?api_key=———-&field1=24.21&field2=1010.48&field3=51.39
I (167131) HTTP_CLIENT: Message sent Successfully
I (170481) BME280: 24.22 degC / 1010.486 hPa / 51.391 %
I (172131) HTTP_CLIENT: post = /update?api_key=————–&field1=24.22&field2=1010.49&field3=51.39
I (172561) HTTP_CLIENT: Message sent Successfully
Host is unreachable
I (5555) esp_ot_br: post = /update?api_key=EDINS0IFTZUN79KR&field1=0.00&field2=0.00&field3=0.00
I(5555) OPENTHREAD:[N] RoutingManager: BR ULA prefix: fd43:7140:2bb7::/48 (loaded)
I(5565) OPENTHREAD:[N] RoutingManager: Local on-link prefix: fd45:4908:9a2d:ddfe::/64
E (5585) esp-tls: [sock=57] connect() error: Host is unreachable
E (5585) esp-tls: Failed to open new connection
E (5585) transport_base: Failed to open a new connection
E (5585) HTTP_CLIENT: Connection failed, sock < 0