In this tutorial, we will see how to send messages to WhatsApp numbers using ES32 and ESP-IDF with Callmeboot’s free API service. The Callmeboot provides an HTTP REST API which can be used to send WhatsApp messages. We will use the HTTP client library available in ESP-IDF to make HTTP GET requests to that message API. Furthermore, you can also use this free service to send motion detection, door opening alerts, etc to your number.

We will program ESP32 with ESP-IDF in VS Code. Before we move ahead, make sure you have the latest version of VS Code installed on your system with the ESP-IDF extension configured.
Introducing WhatsApp
WhatsApp is a cross-platform instant messaging and voice-over IP (VoIP) service owned by Facebook. The application allows users to send text messages, and voice messages, make voice and video calls, and share images, documents, user locations, and other media. WhatsApp also supports end-to-end encryption for all messages and calls, which means that only the sender and the recipient can read or listen to the message and no one else, not even WhatsApp can access the content of the message. WhatsApp was first released in 2009 and has since grown to become one of the most popular messaging apps in the world, with over 2 billion monthly active users. It is available for download on a variety of platforms, including Android, iOS, Windows, and macOS and it is also available as a web-based application.
Introducing CallMeBot API
CallMeBot is a web service that allows users to make phone calls and send WhatsApp messages. It is a third-party service that can be integrated into other applications and websites using an API (Application Programming Interface). The API allows developers to access the functionality of the CallMeBot service and use it in their own applications, such as adding a “call me” button to websites for customer service or sales. The API is typically accessed using a unique API key and allows for sending WhatsApp messages via a set of RESTful web services.
The CallMeBot is a free and easy-to-use API to send WhatsApp messages by only calling an API from our ESP32 using an HTTP client library available in ESP-IDF framework. These APIs are a service that allows you to send yourself messages in real time. You only have to register your phone and take note of your API key. We need to make HTTP GET request from ESP32 to send a message.
How to Get CallMeBot API Key
First, we need to get the API key from callmebot. Follow these steps to get API key and register your number:
- Add this phone number +34611011637 to your phone contacts list. (Name it as you wish)
- Send this message “I allow callmebot to send me messages“ to the new Contact created (using WhatsApp of course)
- Wait until you receive the message “API Activated for your phone number. Your APIKEY is 123123” from the bot.
- Note: If you don’t receive the ApiKey in 2 minutes, please try again after 24hs.
- The WhatsApp message from the bot will contain the API key needed to send messages using the API. For more details, you can check this link.

How to send a WhatsApp text message with CallMeBot
This API is used to send a message via WhatsApp using the WhatABot service.
http://api.whatabot.net/whatsapp/sendMessage?text=" + (message) + "&apikey=" + api_key + "&phone=" + mobile_number;
The API takes in three parameters: “message”, “api_key”, and “mobile_number”. The “message” parameter is the text of the message that you want to send, the “api_key” is your unique API key for accessing the WhatABot service, and the “mobile_number” is the phone number that the message will be sent to. When you make a GET request to this API endpoint with these parameters included in the query string, the API will send the specified message to the specified phone number via WhatsApp.
Create ESP32 ESP-IDF Project to Send Messages to WhatsApp Number
In this section, let’s create an ESP-IDF project to send messages to WhatsApp number.
Open your VS Code and head over to View > Command Palette. Type ESP-IDF: New Project in the search bar and press enter.
Specify the project name and directory. We have named our project ‘esp32_whatsapp.’ For the ESP-IDF board, we have chosen the custom board option. For ESP-IDF target, choose ESP32 module. Click ‘Choose Template’ button to proceed forward.

In the Extension, select the ESP-IDF option:

We will click the ‘sample_project’ under the get-started tab. Now click ‘Create a project using template sample_project.’

You will get a notification that the project has been created. To open the project in a new window, click ‘Yes.’
This opens the project that we created inside the EXPLORER tab. There are several folders inside our project folder. This is the same for every project which you will create through ESP-IDF Explorer.
ESP32 ESP-IDF Code to Send Messages on WhatsApp Number
This code is a program written in C for the ESP32 using the ESP-IDF framework that sends a WhatsApp message using the CallMeBot API. Copy the following code to main.c file in your esp-idf project.
#include <stdio.h>
#include <string.h>
#include <stdlib.h>
#include "esp_log.h"
#include "nvs_flash.h"
#include "esp_event.h"
#include "esp_netif.h"

#include "freertos/FreeRTOS.h"
#include "freertos/task.h"
#include "esp_system.h"

#include "esp_http_client.h"
#include "connect_wifi.h"

static const char *TAG = "HTTP_CLIENT";
char api_key[] = "replace_with_your_api_key";
char whatsapp_num[] = "replace_with_your_whatsapp_number";
char whatsapp_messgae[] = "WhatsApp Message Test!";

char *url_encode(const char *str)
{
    static const char *hex = "0123456789abcdef";
    static char encoded[1024];
    char *p = encoded;
    while (*str)
    {
        if (isalnum(*str) || *str == '-' || *str == '_' || *str == '.' || *str == '~')
        {
            *p++ = *str;
        }
        else
        {
            *p++ = '%';
            *p++ = hex[*str >> 4];
            *p++ = hex[*str & 15];
        }
        str++;
    }
    *p = '\0';
    return encoded;
}

static void send_whatsapp_message(void *pvParameters)
{
    char callmebot_url[] = "https://api.callmebot.com/whatsapp.php?phone=%s&text=%s&apikey=%s";

    char URL[strlen(callmebot_url)];
    sprintf(URL, callmebot_url, whatsapp_num, url_encode(whatsapp_messgae), api_key);
    ESP_LOGI(TAG, "URL = %s", URL);
    esp_http_client_config_t config = {
        .url = URL,
        .method = HTTP_METHOD_GET,
    };

    esp_http_client_handle_t client = esp_http_client_init(&config);
    esp_err_t err = esp_http_client_perform(client);

    if (err == ESP_OK)
    {
        int status_code = esp_http_client_get_status_code(client);
        if (status_code == 200)
        {
            ESP_LOGI(TAG, "Message sent Successfully");
        }
        else
        {
            ESP_LOGI(TAG, "Message sent Failed");
        }
    }
    else
    {
        ESP_LOGI(TAG, "Message sent Failed");
    }
    esp_http_client_cleanup(client);

    vTaskDelete(NULL);
}

void app_main(void)
{
    esp_err_t ret = nvs_flash_init();
    if (ret == ESP_ERR_NVS_NO_FREE_PAGES || ret == ESP_ERR_NVS_NEW_VERSION_FOUND)
    {
        ESP_ERROR_CHECK(nvs_flash_erase());
        ret = nvs_flash_init();
    }
    ESP_ERROR_CHECK(ret);
    connect_wifi();
    if (wifi_connect_status)
    {
        xTaskCreate(&send_whatsapp_message, "send_whatsapp_message", 8192, NULL, 5, NULL);
    }
}
How Code Works?
Theese lines of code includes several headers such as “stdio.h”, “string.h” and “stdlib.h” which provide basic input/output operations, string manipulation, and memory allocation functions respectively.
It also includes headers specific to the ESP32 microcontroller such as “esp_log.h”, “nvs_flash.h”, “esp_event.h” and “esp_netif.h”. These headers provide functions for logging, non-volatile storage, event handling, and network interface management.
#include <stdio.h>
#include <string.h>
#include <stdlib.h>
#include "esp_log.h"
#include "nvs_flash.h"
#include "esp_event.h"
#include "esp_netif.h"

#include "freertos/FreeRTOS.h"
#include "freertos/task.h"
#include "esp_system.h"

#include "esp_http_client.h"
#include "connect_wifi.h"
Define several global variables such as “api_key” which is the API key for the CallMeBot service, “whatsapp_num” which is the phone number to send the message to and “whatsapp_messgae” which is the content of the message to be sent.
static const char *TAG = "HTTP_CLIENT";
char api_key[] = "replace_with_your_api_key";
char whatsapp_num[] = "replace_with_your_whatsapp_number";
char whatsapp_messgae[] = "WhatsApp Message Test!";
Function to Generate URLEncoded Messages
Define a function called “url_encode” that takes a single parameter, a pointer to a null-terminated string called “str”.
char *url_encode(const char *str)The function first declares a static array called “encoded” which will be used to store the encoded version of the input string. It also declares two static pointers called “hex” and “p”, which point to the string “0123456789abcdef” and the start of the encoded array, respectively.
 static const char *hex = "0123456789abcdef";
 static char encoded[1024];
 char *p = encoded;
The function then enters a while loop that iterates through each character in the input string. Within the loop, if the current character is alphanumeric or one of the specified characters ‘-‘, ‘_’, ‘.’ or ‘~’, it is directly added to the encoded string. Otherwise, the character is encoded by first adding a ‘%’ symbol, and then adding the corresponding hexadecimal values of the character’s high and low 4 bits.
while (*str)
    {
        if (isalnum(*str) || *str == '-' || *str == '_' || *str == '.' || *str == '~')
        {
            *p++ = *str;
        }
        else
        {
            *p++ = '%';
            *p++ = hex[*str >> 4];
            *p++ = hex[*str & 15];
        }
        str++;
    }
After the loop, a null-terminator character is added to the encoded string and the function returns the pointer to the start of the encoded string. This function will encode any string passed to it, so that it can be used as a valid part of a URL.
 *p = '\0';
   return encoded;
WhatsApp Message Send Function
This function is responsible for sending a WhatsApp message to a specified number using the Callmebot API. The “send_whatsapp_message” takes a single parameter, “pvParameters” (which is not used in this function).
static void send_whatsapp_message(void *pvParameters)
First, this function declares a variable “callmebot_url” which is a string that contains the URL template for the Callmebot API. Next, it declares a variable “URL” which is an array of characters with the same length as “callmebot_url”. After that it uses the “sprintf” function to format the URL by replacing certain placeholders in “callmebot_url” with the actual values of “whatsapp_num” (which should be the recipient’s phone number), “url_encode(whatsapp_messgae)” (which is the message that needs to be sent) and “api_key” (which is the user’s API key) respectively.
char callmebot_url[] = "https://api.callmebot.com/whatsapp.php?phone=%s&text=%s&apikey=%s";

char URL[strlen(callmebot_url)];
sprintf(URL, callmebot_url, whatsapp_num, url_encode(whatsapp_messgae), api_key);
ESP_LOGI(TAG, "URL = %s", URL);
Now declares a struct called “config” which is used to configure the HTTP client with the URL and the method “HTTP_METHOD_GET”. Next, it creates a handle for the HTTP client using the “esp_http_client_init” function and “config” struct.
   esp_http_client_config_t config = {
        .url = URL,
        .method = HTTP_METHOD_GET,
    };

    esp_http_client_handle_t client = esp_http_client_init(&config);
After that use the “esp_http_client_perform” function to send the request to the server and check the response. If the request was successful, the function checks the status code of the response. If the status code is 200, it indicates that the message was sent successfully, else the message sent failed. The function then cleans up the client handle by calling “esp_http_client_cleanup” and deletes the task.
esp_err_t err = esp_http_client_perform(client);

    if (err == ESP_OK)
    {
        int status_code = esp_http_client_get_status_code(client);
        if (status_code == 200)
        {
            ESP_LOGI(TAG, "Message sent Successfully");
        }
        else
        {
            ESP_LOGI(TAG, "Message sent Failed");
        }
    }
    else
    {
        ESP_LOGI(TAG, "Message sent Failed");
    }
    esp_http_client_cleanup(client);

    vTaskDelete(NULL);
Main Function
The “app_main” is the entry point of the application. It initializes the Non-Volatile Storage (NVS) flash on the ESP32 microcontroller, which is used to store data that needs to survive a power cycle.
After that, it calls “nvs_flash_init” to initialize the NVS flash and checks the return value. If the return value is “ESP_ERR_NVS_NO_FREE_PAGES” or “ESP_ERR_NVS_NEW_VERSION_FOUND”, it means that the NVS flash needs to be erased and initialized again. Then calls “ESP_ERROR_CHECK” to check if there is an error with the NVS flash initialization.
esp_err_t ret = nvs_flash_init();
    if (ret == ESP_ERR_NVS_NO_FREE_PAGES || ret == ESP_ERR_NVS_NEW_VERSION_FOUND)
    {
        ESP_ERROR_CHECK(nvs_flash_erase());
        ret = nvs_flash_init();
    }
    ESP_ERROR_CHECK(ret);
Now calls the “connect_wifi” function to connect to the WiFi network. It then checks the wifi_connect_status, if the wifi is connected successfully, the function creates a new task called “send_whatsapp_message” using the “xTaskCreate” function. This task will run the “send_whatsapp_message” function in the background and will have a stack size of 8192 bytes and a priority of 5. The task is created with a NULL handle, so it can’t be referenced later on. Because we will delete it after sending a WhatsApp message.
 connect_wifi();
    if (wifi_connect_status)
    {
        xTaskCreate(&send_whatsapp_message, "send_whatsapp_message", 8192, NULL, 5, NULL);
    }
This function serves as the entry point of the application and is responsible for initializing the ESP32, connecting to WiFi, and creating the task that sends a WhatsApp message.
Note: there is one header file with the name of “connect_wifi.h” in this project, we have created this in previous tutorials. You also need to add that file. You can download complete project from next section download link.
ESP-IDF Send Messages to WhatsApp Number Demo
In this section, we will see a demo to Send Messages to WhatsApp. First of all, download the complete project from the following link and build the project.
Configure Wi-Fi Credentials
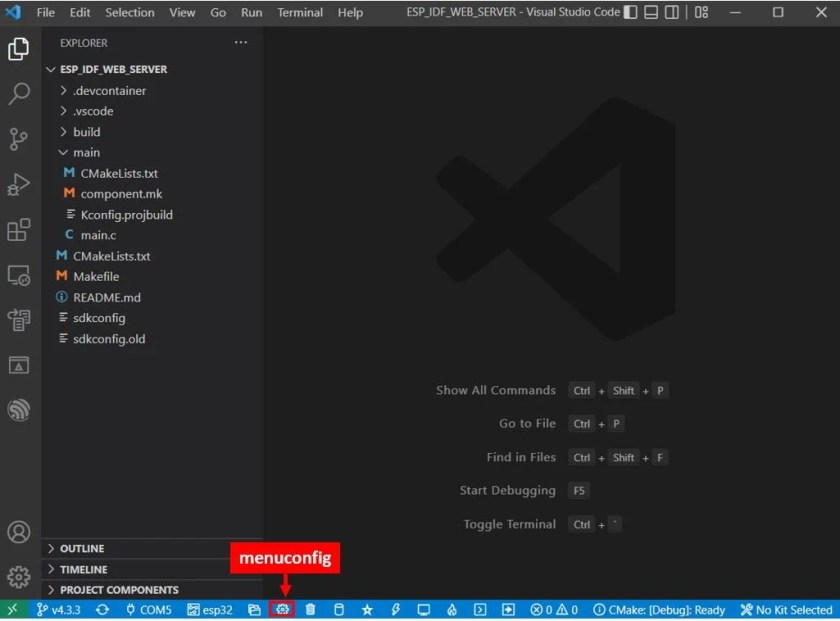
Now head over to the menuconfig. Click the icon shown below. It opens the ESP-IDF SDK Configuration Editor.
Scroll down and open the Example Configuration. Here we can set the configuration parameters for this example according to our needs. This includes the Wi-Fi SSID, Wi-Fi password, and Maximum retry number. Specify the Wi-Fi SSID and password of your router that the ESP32 board will connect to. By default, the maximum retries are set to 5. You can change it according to your preference. After specifying the configuration parameters, click the Save button on the top.

Disable ESP TLS
We are using http instead of https therefore we need to disable the ESP-TLS component from settings->Components Config>ESP-TL.

To flash your chip, type the following command in the serial terminal. Remember to replace the COM port with the one through which your board is connected.
idf.py -p COMX flash monitor
After the code flashes successfully, you can view all the informational logs. First, the station Wi-Fi is initialized. Then we can view the esp_netif_handlers which includes the IP, mask, and gw addresses. Then we get the log “got IP” followed by the IP address which shows that ESP32 has successfully connected with your Wi-Fi network.
Now if everything works fine, you will get a message on the console that “Message sent Successfully” as shown below.

Also, we will receive a message on your WhatsApp number.

You may also like to read:
- ESP32 ESP-IDF WebSocket Web Server with LED Control Example
- ESP32 ESP-IDF SPIFFS Web Server
- ESP32-CAM ESP-IDF Live Streaming Web Server
- ESP32-CAM ESP-IDF Take Photos and Save into SD Card
- ESP32 ESP-IDF MQTT Publish BME680 Sensor Readings
- ESP32 BME680 Web Server ESP-IDF
We are a team of experienced Embedded Software Developers with skills in developing Embedded Linux, RTOS, and IoT products from scratch to deployment with a demonstrated history of working in the embedded software industry. Contact us for your projects: admin@esp32tutorials.com
if could be useful for someone
– “isalnum” did not work for me until ctype.h was added to includes
– url_encode gives error “array subscript has type char” until *str defined as “unsigned char”, not just “char”
We didn’t get issues like this. Which version of ESP-IDF you are using?
HI , I use ESP IDF v.1.5.1 with VS code 1.75.0
You are using very old version that is why getting those errors.
It work better >
char* url_encode_2(char* originalText) {
static char encodedText[1024];
static const char *hex = “0123456789abcdef”;
char *d = encodedText;
while(*originalText) {
if ((‘a’ <= *originalText && *originalText <= 'z')
|| ('A' <= *originalText && *originalText <= 'Z')
|| ('0' <= *originalText && *originalText > 4) & 0x0F];
*d++ = hex[*originalText & 0x0F];
}
originalText++;
}
*d = ‘\0’;
return encodedText;
}
A API funciona de forma birdirecional, posso inciar a troca de msg com o ESP32 atráves do WhatsApp?