In this tutorial, we will learn how to send SMS with ESP32 and ESP-IDF using Twilio web services API. Twilio is a cloud communications platform that allows software developers to programmatically make and receive phone calls, send and receive text messages, and perform other communication functions using its web service APIs.

We will use HTTP client library available in ESP-IDF to make HTTP POST requests to Twilio REST API using different fields. These fields will contain a message that we want to send. For demonstration, we will send a simple text message. But you can also send sensor readings such as DS18B20, DHT22, BME680, and SHT31, alter notifications, motion detection notifications, etc.
We will program ESP32 with ESP-IDF in VS Code. Before we move ahead, make sure you have the latest version of VS Code installed on your system with the ESP-IDF extension configured.
Twilio Web Service
Twilio is a cloud communications platform that provides APIs for voice and SMS communications, as well as other communication channels like video and chat. Twilio’s web services allow developers to build and integrate communication capabilities into their applications and systems.
With Twilio, developers can programmatically send and receive text messages, make and receive phone calls, send multimedia messages, and manage communication channels like WhatsApp and Facebook Messenger, all using simple REST APIs.
Twilio also provides additional tools and services, such as Twilio Studio, a visual application builder, and Twilio Flex, a cloud-based contact center platform.
Overall, Twilio provides a comprehensive and scalable platform for businesses and developers to build and integrate communication capabilities into their applications, products, and systems.
Create Twilio Trial Account
Go to the Twilio website (www.twilio.com) and sign up for a free account.

Enter your details and enter the ‘Start your free trial’ button.

Confirm your email address by following a link sent to your email.

After you’ve confirmed your email, log in to your Twilio console.

Upon successful verification, your Twilio account dashboard will become available:

Set up Twilio Free Account
Go to Phone Numbers > Manage > Verified Caller IDs. Here, the phone number provided during the verification process will be visible in your Twilio account.

Click on “Add a new Caller ID” in the Twilio console.
- Enter the desired phone number.
- A verification code will be sent to the provided number via SMS.
- Enter the verification code in the Twilio console to complete the Caller ID addition process.
Note: When using a free trial Twilio account, any number used for sending SMS must be verified as a Caller ID first.

Get a Phone Number from Twilio
To purchase a phone number for use with Twilio, follow these steps:
- Navigate to the “Phone Numbers” section in the Twilio console.
- Select “Buy a Number” and choose the desired capabilities, including SMS.
- Use the country and advanced search options to find a suitable number from the available options.
Note: Even though you are using a free trial Twilio account, you will receive $15.50 in credit that can be used to purchase a phone number.

Accept the terms and conditions and click the Buy button.

Additionally, you may need to set up configuration for the purchased number.

To view the recently purchased phone number, go to “Phone Numbers” > “Manage” > “Active Numbers” in the Twilio console.
Setting Up a Programmable Messaging Service
Having set up a free Twilio account, added a verified Caller ID, and acquired a Twilio number for sending SMS, the next step is to set up the Programmable Messaging service. To do so:
- Navigate to “Messaging” > “Try it out” > “Get Set Up” in the Twilio console.
- The Programmable Messaging service welcome page will open.
- Click the “Start setup” button to begin the setup process.

- On the setup page, provide a name for the service.
- Click the “Create Messaging Service” button.

Enter the Twilio Phone number that you just bought. Then click ‘Add this number.’

Having completed the setup process, you now have access to your Message Service SID, Account SID, and Auth Token. These credentials will be necessary when programming the ESP32 ESP-IDF to send SMS.

Testing the Service
Before writing an ESP32 ESP-IDF code to send SMS, it is advisable to test the Programmable Messaging service that was created using curl.
To do so:
- Go to “Messaging” > “Try it out” > “Send an SMS” in the Twilio console.
- Enter the recipient’s phone number. Note: The recipient’s number must be a verified Caller ID and the message must be sent using the Messaging Service SID.
- Input the message body and click the “Send test SMS” button to send a test message.

Create ESP32 ESP-IDF Project to Send SMS with Twilio
In this section, let’s create an ESP-IDF project to send SMS with Twilio.
Open your VS Code and head over to View > Command Palette. Type ESP-IDF: New Project in the search bar and press enter.
Specify the project name and directory. We have named our project ‘esp32_sms_twilio.’ For the ESP-IDF board, we have chosen the custom board option. For ESP-IDF target, choose ESP32 module. Click ‘Choose Template’ button to proceed forward.

In the Extension, select the ESP-IDF option:

We will click the ‘sample_project’ under the get-started tab. Now click ‘Create a project using template sample_project.’

You will get a notification that the project has been created. To open the project in a new window, click ‘Yes.’
This opens the project that we created inside the EXPLORER tab. There are several folders inside our project folder. This is the same for every project which you will create through ESP-IDF Explorer.
ESP32 ESP-IDF Code to Send SMS with Twilio
The ESP-IDF implements a function to send SMS messages using the Twilio API. It requires a Twilio account, which provides an account SID and an auth token to be used for authentication. The recipient and sender phone numbers, as well as the message to be sent, are defined as variables in the code.
The Twilio API URL and the data to be sent are constructed from these variables and the auth information. The esp_http_client library is used to send an HTTP POST request to the Twilio API with the constructed data. The result of the request is checked and, if successful, a message is logged indicating that the message was sent successfully. If an error occurs, a message indicating failure is logged. The function is invoked as a task created by the main function after connecting to a Wi-Fi network.
#include <stdio.h>
#include <string.h>
#include <stdlib.h>
#include "esp_log.h"
#include "nvs_flash.h"
#include "esp_event.h"
#include "esp_netif.h"

#include "freertos/FreeRTOS.h"
#include "freertos/task.h"
#include "esp_system.h"

#include "esp_http_client.h"
#include "connect_wifi.h"

static const char *TAG = "HTTP_CLIENT";

// Your Account SID and Auth Token from twilio.com/console
char account_sid[] = "replace_with_your_account_sid";
char auth_token[] = "replace_with_your_account_auth_token";
char recipient_num[] = "replace_with_your_reciver_number";
char sender_num[] = "replace_with_your_twilio_number";


char message[] = "Hello This is a test message";

void twilio_send_sms(void *pvParameters)
{

    char twilio_url[200];
    snprintf(twilio_url,
             sizeof(twilio_url),
             "%s%s%s",
             "https://api.twilio.com/2010-04-01/Accounts/",
             account_sid,
             "/Messages");

    char post_data[200];

    snprintf(post_data,
             sizeof(post_data),
             "%s%s%s%s%s%s",
             "To=",
             recipient_num,
             "&From=",
             sender_num,
             "&Body=",
             message);

    esp_http_client_config_t config = {
        .url = twilio_url,
        .method = HTTP_METHOD_POST,
        .auth_type = HTTP_AUTH_TYPE_BASIC,
    };

    esp_http_client_handle_t client = esp_http_client_init(&config);
    esp_http_client_set_header(client, "Content-Type", "application/x-www-form-urlencoded");
    esp_http_client_set_username(client, account_sid);
    esp_http_client_set_password(client, auth_token);

    ESP_LOGI(TAG, "post = %s", post_data);
    esp_http_client_set_post_field(client, post_data, strlen(post_data));

    esp_err_t err = esp_http_client_perform(client);

    if (err == ESP_OK)
    {
        int status_code = esp_http_client_get_status_code(client);
        if (status_code == 201)
        {
            ESP_LOGI(TAG, "Message sent Successfully");
        }
        else
        {
            ESP_LOGI(TAG, "Message sent Failed");
        }
    }
    else
    {
        ESP_LOGI(TAG, "Message sent Failed");
    }
    esp_http_client_cleanup(client);
    vTaskDelete(NULL);
}

void app_main(void)
{
	esp_err_t ret = nvs_flash_init();
	if (ret == ESP_ERR_NVS_NO_FREE_PAGES || ret == ESP_ERR_NVS_NEW_VERSION_FOUND)
	{
		ESP_ERROR_CHECK(nvs_flash_erase());
		ret = nvs_flash_init();
	}
	ESP_ERROR_CHECK(ret);
	connect_wifi();
	if (wifi_connect_status)
	{
		xTaskCreate(&twilio_send_sms, "twilio_send_sms", 8192, NULL, 6, NULL);
	}
}
How Code Works?
These lines of code include several headers such as “stdio.h”, “string.h” and “stdlib.h” which provide basic input/output operations, string manipulation, and memory allocation functions respectively.
It also includes headers specific to the ESP32 microcontroller such as “esp_log.h”, “nvs_flash.h”, “esp_event.h” and “esp_netif.h”. These headers provide functions for logging, non-volatile storage, event handling, and network interface management.
#include <stdio.h>
#include <string.h>
#include <stdlib.h>
#include "esp_log.h"
#include "nvs_flash.h"
#include "esp_event.h"
#include "esp_netif.h"

#include "freertos/FreeRTOS.h"
#include "freertos/task.h"
#include "esp_system.h"

#include "esp_http_client.h"
#include "connect_wifi.h"
Define four character arrays to store the Twilio account SID, Twilio auth token, recipient phone number, and sender phone number. These are string literals that are used to send an SMS message through the Twilio API.
// Your Account SID and Auth Token from twilio.com/console
char account_sid[] = "replace_with_your_account_sid";
char auth_token[] = "replace_with_your_account_auth_token";
char recipient_num[] = "replace_with_your_reciver_number";
char sender_num[] = "replace_with_your_twilio_number";
Twilio Send SMS Function
This function is responsible for sending SMS using Twilio API and ESP-IDF HTTP client library. The function twilio_send_sms() takes in a void pointer as a parameter.
void twilio_send_sms(void *pvParameters)
Declares a character array twilio_url of size 200, which is used to store the URL for the Twilio API endpoint for sending SMS messages.
char twilio_url[200];
Constructs the URL for the Twilio API endpoint by concatenating the various string literals and the values of the account_sid and auth_token variables. The result is stored in the twilio_url array.
snprintf(twilio_url,
             sizeof(twilio_url),
             "%s%s%s",
             "https://api.twilio.com/2010-04-01/Accounts/",
             account_sid,
             "/Messages");
Declares a character array post_data of size 200, which is used to store the data that will be posted to the Twilio API endpoint.
char post_data[200];
Constructs the data that will be posted to the Twilio API endpoint by concatenating the various string literals and the values of the recipient_num, sender_num, and message variables. The result is stored in the post_data array.
snprintf(post_data,
             sizeof(post_data),
             "%s%s%s%s%s%s",
             "To=",
             recipient_num,
             "&From=",
             sender_num,
             "&Body=",
             message);
Declares a structure config of type esp_http_client_config_t and initializes it with the values of the twilio_url variable and HTTP_METHOD_POST and HTTP_AUTH_TYPE_BASIC constants.
 esp_http_client_config_t config = {
        .url = twilio_url,
        .method = HTTP_METHOD_POST,
        .auth_type = HTTP_AUTH_TYPE_BASIC,
    };
Call the esp_http_client_init function, passing it a pointer to the config structure, and stores the resulting client handle in the client variable.
esp_http_client_handle_t client = esp_http_client_init(&config);
Calls the esp_http_client_set_header function, passing it the client handle and a string literal, to set the value of the Content-Type header for the request.
esp_http_client_set_header(client, "Content-Type", "application/x-www-form-urlencoded");
Calls the esp_http_client_set_username and esp_http_client_set_password functions, passing them the client handle and the values of the account_sid and auth_token variables, respectively, to set the credentials for basic authentication.
 esp_http_client_set_username(client, account_sid);
 esp_http_client_set_password(client, auth_token);
Next set the post field of the client to the post_data array and its length. Finally, performs the HTTP request using the esp_http_client_perform() function, and assigns the result to the err variable.
esp_http_client_set_post_field(client, post_data, strlen(post_data));

esp_err_t err = esp_http_client_perform(client);
At the end code check whether the err variable equals ESP_OK or not which checks if HTTP request to Twilio API was successful or not. If err equals ESP_OK, the code checks the status code of the response. If the status code is 200, print a message indicating that the SMS was sent successfully. If the status code is not 200, print a message indicating that the message was sent failed.
If err does not equal ESP_OK, that means the HTTP request was not successful and print a message indicating that the message was sent failed.
The esp_http_client_cleanup function is called to free the resources associated with the client variable. The vTaskDelete(NULL) function is called to delete the current task.
if (err == ESP_OK)
    {
        int status_code = esp_http_client_get_status_code(client);
        if (status_code == 201)
        {
            ESP_LOGI(TAG, "Message sent Successfully");
        }
        else
        {
            ESP_LOGI(TAG, "Message sent Failed");
        }
    }
    else
    {
        ESP_LOGI(TAG, "Message sent Failed");
    }
    esp_http_client_cleanup(client);
    vTaskDelete(NULL);
In summary, this function sends SMS using Twilio API and ESP32 ESP-IDF. It uses HTTP protocol to communicate with the Twilio API to send a message. The function uses the account SID and auth token from the Twilio account for authentication. The recipient and sender phone numbers are provided as global variables, and the message body is passed as another global variable.
This function prepares the URL and the post data required for the HTTP request. It initializes an HTTP client, sets the header and username/password for the authentication, sets the post field with the message body, performs the HTTP request, and checks the response status. If the status code is 201, it logs a success message, otherwise, it logs a failure message. Finally, it cleans up the HTTP client and deletes the task.
Main App Function
The “app_main” is the entry point of the application. It initializes the Non-Volatile Storage (NVS) flash on the ESP32 microcontroller, which is used to store data that needs to survive a power cycle. After that, it calls “nvs_flash_init” to initialize the NVS flash and checks the return value. If the return value is “ESP_ERR_NVS_NO_FREE_PAGES” or “ESP_ERR_NVS_NEW_VERSION_FOUND”, it means that the NVS flash needs to be erased and initialized again. Then calls “ESP_ERROR_CHECK” to check if there is an error with the NVS flash initialization.
esp_err_t ret = nvs_flash_init();
	if (ret == ESP_ERR_NVS_NO_FREE_PAGES || ret == ESP_ERR_NVS_NEW_VERSION_FOUND)
	{
		ESP_ERROR_CHECK(nvs_flash_erase());
		ret = nvs_flash_init();
	}
	ESP_ERROR_CHECK(ret);
Connects to a wifi network by calling the “connect_wifi()” function.
connect_wifi();
If the wifi connection is successful, it creates a task “twilio_send_sms” which sends SMS using Twilio API.
if (wifi_connect_status)
	{
		xTaskCreate(&twilio_send_sms, "twilio_send_sms", 8192, NULL, 6, NULL);
	}
Note: there is one header file with the name of “connect_wifi.h” in this project, we have created this in previous tutorials. You also need to add that file. You can download complete project from next section download link.
ESP-IDF Send SMS with Twilio Demo
In this section, we will see a demo to Send Messages to WhatsApp. First of all, download the complete project from the following link and build the project.
Configure Wi-Fi Credentials
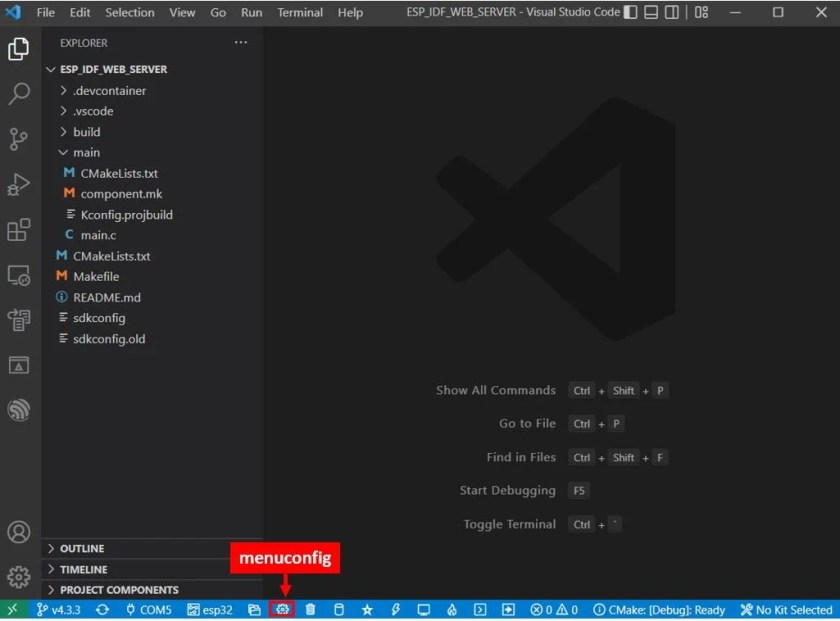
Now head over to the menuconfig. Click the icon shown below. It opens the ESP-IDF SDK Configuration Editor.
Scroll down and open the Example Configuration. Here we can set the configuration parameters for this example according to our needs. This includes the Wi-Fi SSID, Wi-Fi password, and Maximum retry number. Specify the Wi-Fi SSID and password of your router that the ESP32 board will connect to. By default, the maximum retries are set to 5. You can change it according to your preference. After specifying the configuration parameters, click the Save button on the top.

Disable ESP TLS
We are using HTTP instead of HTTPS therefore we need to disable the ESP-TLS component from settings->Components Config>ESP-TL.

To flash your chip, type the following command in the serial terminal. Remember to replace the COM port with the one through which your board is connected.
idf.py -p COMX flash monitor
After the code flashes successfully, you can view all the informational logs. First, the station Wi-Fi is initialized. Then we can view the esp_netif_handlers which includes the IP, mask, and gw addresses. Then we get the log “got IP” followed by the IP address which shows that ESP32 has successfully connected with your Wi-Fi network.
Now if everything works fine, you will get messages on the console that “Message sent Successfully” as shown below.

Now open your ThinkgSpeak account and you will be able to view sensor readings on graphs as shown below:

You may also like to read:
- ESP32 ESP-IDF Send Messages to WhatsApp Number
- ESP32 ESP-IDF Send Sensor Readings to ThingSpeak Cloud Platform
- ESP32 ESP-IDF SPIFFS Web Server
- ESP32-CAM ESP-IDF Live Streaming Web Server
- ESP32-CAM ESP-IDF Take Photos and Save into SD Card
- ESP32 ESP-IDF MQTT Publish BME680 Sensor Readings
- ESP32 BME680 Web Server ESP-IDF
We are a team of experienced Embedded Software Developers with skills in developing Embedded Linux, RTOS, and IoT products from scratch to deployment with a demonstrated history of working in the embedded software industry. Contact us for your projects: admin@esp32tutorials.com